To create a data source in Application Server, we need to do 3 steps
- Creating the authentication alias
- Creating the JDBC provider
- Creating the data source
Here we take Websphere Application Server as Application Server and Oracle Express as the reference DB.
Creating the authentication alias
Click on Global Security in Security. Then Click on J2C Authentication data in Java Authentication and Authorization Service.
Click on New
Alias name can be given anything. User Id and Password are the username and password of the Database. Give your database username and password and click on ok.
Click on save directly to the master configuration, so the changes are made in master configuration.
We can see the created login credentials.
Creating the JDBC Provider
Click on new.
Click on the database type. Here we are selecting oracle as the database. Click on the Provider type and click on implementation type. Give the name . Here the name is given as Oracle JDBC provider. Click on next.
Give the path where the driver jar file is present in your PC. Click on next.
A summary of the selected configurations will be displayed in the next window. Click on Finish.
Click on save to the master configuration. We can see our created JDBC provider.
Creating the data source
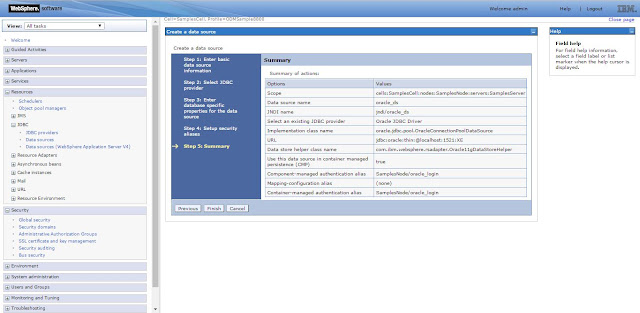
Give the data source name as required. Here we have given the data source name as oracle_ds and JNDI name as jndi/oracle_ds.
Click on select an existing JDBC provider and select the JDBC provider whcih is created in step 2 from the drop-down menu.
Give the database URL. The URL shown in the image is the URL of the Oracle Express database. Here "XE" in the URL is sid of the Oracle Express. The sid of Oracle Standard edition will be "orcl".
Select the authentication alias which is created in Step 1.
A summary of the selected configuration will be displayed in the next window. Click on Finish.
Click on save to master configuration. We can see the created data source in the list of data sources.
We have completed all the steps needed to create the data source. Now we needed to check whether the data source is created correctly. Click the data source we have created.
Click on Test Connection. If the data source is created correctly, we will get the success message as shown in the below fig.


0 comments:
Post a Comment